How to 3D Print Grips for Utensils: Step‑by‑Step Guide to Designing, Printing, and Fitting Ergonomic DIY Handles
Introduction
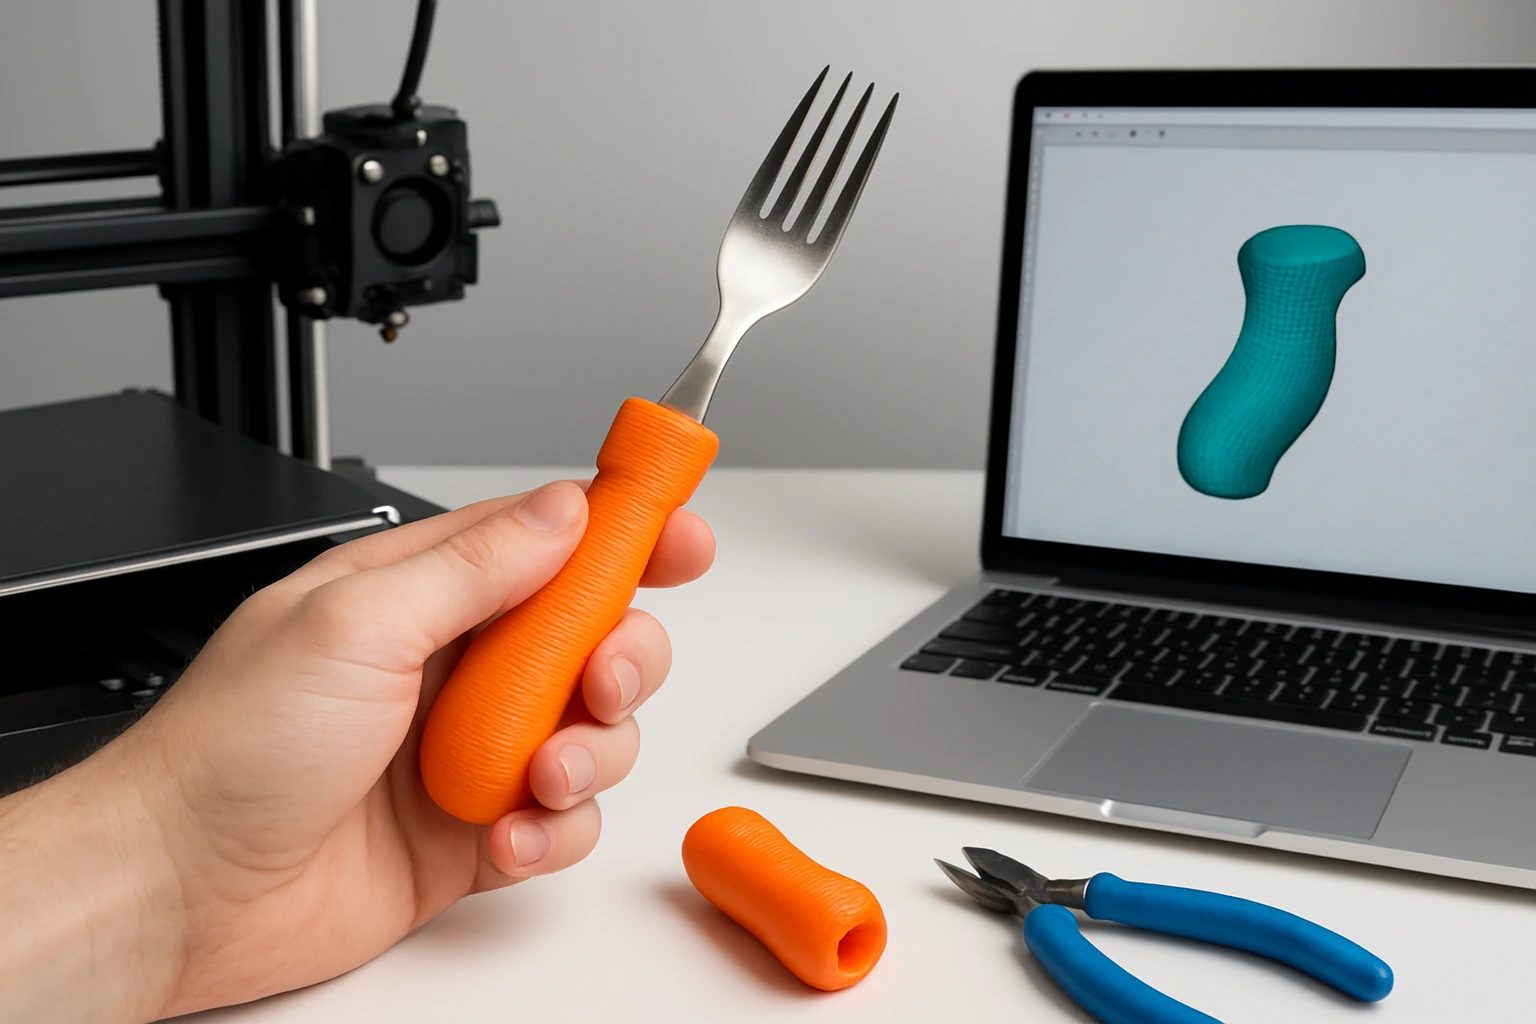
One will discover how to transform ordinary kitchen tools into comfortable, personalized extensions through 3D printing. This guide explains the entire workflow from concept sketch to final installation, ensuring that each grip meets ergonomic standards. Readers will also learn how selected professional tools can streamline the process and improve the durability of the finished product. By following the instructions, one will achieve functional grips that reduce hand fatigue and enhance culinary efficiency.
What You'll Need
- Desktop 3D printer capable of 0.2 mm layer resolution.
- PLA or PETG filament (1.75 mm diameter).
- Computer with CAD software (e.g., Fusion 360 or Tinkercad).
- Sandpaper (120‑grit to 400‑grit) for post‑processing.
- Epoxy resin and a bubble‑removal tool – Moumouten Fiberglass Laminating Roller (price $14.79, rating 5/5).
- Silicone casting mold – Rockler Silicone Resin Mold (price $24.99, rating 4.8/5).
- Optional ergonomic testing aid – Korikahm Cable Attachment (price $32.89, rating 4.4/5).
Step 1: Define the Grip Geometry
One should begin by measuring the diameter of the utensil handle that will receive the new grip. Accurate dimensions allow the CAD model to wrap snugly without excessive clearance, which is essential for a secure fit. Using the chosen CAD program, create a cylindrical base that matches the measured diameter and extend it to the desired length, typically between 30 mm and 50 mm for most kitchen tools. Incorporate ergonomic contours such as finger grooves or a slight flare at the end to accommodate natural hand placement.
Step 2: Apply Ergonomic Design Principles
Ergonomic design reduces strain by distributing pressure across the palm and fingers. One can reference the shape of the Korikahm Cable Attachment, which features a hand‑grip contour that aligns with the natural curve of the wrist. Replicate similar curvature in the digital model, ensuring that the grip thickness does not exceed 12 mm to maintain control. Add texturing—such as a subtle lattice or knurl pattern—to increase friction without compromising comfort.
Step 3: Export and Prepare the Print File
After finalizing the model, export it as an STL file and import it into slicing software. Set the layer height to 0.2 mm, infill to 30 percent, and enable supports only where overhangs exceed 45 degrees. Selecting a higher infill percentage improves rigidity, which is beneficial for utensils that experience repetitive force. Verify the estimated print time and material usage to ensure the project remains within budget.
Step 4: Print the Prototype
Load PLA or PETG filament into the printer, ensuring the nozzle temperature matches the filament specifications (typically 200 °C for PLA, 240 °C for PETG). Begin the print and monitor the first few layers for proper adhesion; a well‑adhered base prevents warping later in the process. Once the print completes, allow it to cool for at least five minutes before removal to avoid deformation. Inspect the raw print for any visible defects such as stringing or layer separation.
Step 5: Post‑Process the Printed Grip
Begin by removing any support structures using needle‑nose pliers, taking care not to damage delicate features. Sand the surface progressively from 120‑grit to 400‑grit sandpaper, creating a smooth finish that mimics professional injection‑molded parts. If a glossy appearance is desired, apply a thin coat of epoxy resin to seal the surface; the Moumouten Fiberglass Laminating Roller is ideal for eliminating air bubbles during this step, ensuring a flawless finish.
Step 6: Create a Silicone Over‑Mold (Optional)
For users who prefer a softer, rubber‑like grip, the printed PLA core can be over‑molded with silicone using the Rockler Silicone Resin Mold. Place the printed grip inside one of the dual cavities, securing it with a small amount of double‑sided tape to prevent movement. Mix the silicone according to the manufacturer’s instructions, pour it into the cavity, and allow it to cure for the recommended time, typically four hours. After demolding, the silicone layer provides a comfortable, slip‑resistant surface while preserving the underlying structural strength.
Step 7: Fit the Grip onto the Utensil
Slide the finished grip onto the utensil handle, confirming that it seats evenly without gaps. If the grip feels loose, apply a thin line of epoxy around the interior surface before insertion; the adhesive will fill micro‑gaps and create a permanent bond. For removable grips, consider using a removable double‑sided tape that offers strong adhesion yet allows future replacement. Test the assembled utensil by performing typical kitchen motions to ensure that the grip remains secure under load.
Tips & Pro Tips
- Design the grip with a slight taper toward the tip; this reduces material usage and improves tactile feedback.
- When sanding, work in a circular motion to avoid creating linear scratches that become visible after coating.
- Use a heat gun briefly on the printed surface before applying epoxy; the slight warm‑up improves resin flow and adhesion.
- For color customization, incorporate filament dyed in the desired hue, or add pigment to the silicone before casting.
- Test ergonomics by holding the grip for several minutes; adjust the CAD model if discomfort is noted before final printing.
Troubleshooting
Problem: Air bubbles appear in the epoxy coating.
Solution: Use the Moumouten Fiberglass Laminating Roller to roll over the wet resin, forcing trapped air to the edges.
Problem: Silicone does not release from the mold.
Solution: Apply a thin coat of mold release spray before pouring, and ensure the curing temperature is within the recommended range.
Problem: Printed grip is too tight on the utensil.
Solution: Slightly increase the internal diameter in the CAD model (by 0.2 mm) and reprint, or sand the interior of the grip gently.
Conclusion
One has now mastered the complete process of creating ergonomic, custom‑fit utensil grips using 3D printing technology. By following the systematic steps—from precise measurement and ergonomic CAD design to careful post‑processing and optional silicone over‑molding—one can produce professional‑grade handles that enhance comfort and performance. The recommended tools, including the Moumouten roller, Rockler silicone mold, and Korikahm cable attachment, provide reliable solutions that streamline each phase of the workflow. Readers are encouraged to experiment with shapes, colors, and materials to develop a unique collection of grips tailored to their culinary needs.
Products Mentioned in This Guide
Frequently Asked Questions
What filament should I use for 3D‑printed utensil grips?
PLA is easy to print and works for light‑use grips, while PETG provides extra strength and heat resistance for tougher kitchen tasks.
What layer height gives the best balance of detail and speed?
A 0.2 mm layer resolution is recommended for smooth surfaces without excessively long print times.
Which CAD software is suitable for designing ergonomic handles?
Both Fusion 360 and Tinkercad can create the needed curves, with Fusion 360 offering advanced tools for precise ergonomics.
How do I finish the printed grips for a comfortable feel?
Sand the prints from 120‑grit to 400‑grit, then coat with epoxy resin to seal and smooth the surface.
Do I need a silicone mold for the grips?
A silicone casting mold lets you replicate the design and add a durable resin layer, improving longevity and grip texture.