How to Install Pull-Down Shelves in Kitchen Cabinets: Step‑by‑Step DIY Guide
Introduction
Organizing the upper portions of kitchen cabinets can be a daunting task for many homeowners. This guide will teach the reader how to install pull‑down shelves that transform hard‑to‑reach spaces into accessible storage zones. By following the systematic instructions, one can improve kitchen efficiency while maintaining a clean aesthetic. The knowledge gained will also be applicable to other rooms such as bathrooms or utility closets.
What You’ll Need
The following materials and tools are recommended to ensure a smooth installation process. Basic hand tools such as a drill, screwdriver, level, and measuring tape are essential. In addition, a few specialized products from reputable manufacturers will simplify the task and increase durability. The list below includes optional products that can be purchased on Amazon.
- Measuring tape
- Power drill with appropriate bits
- Phillips‑head screwdriver
- Carpenter’s level
- Stud finder (optional but helpful)
- Mounting hardware supplied with the chosen shelf
- Rurazong 3‑Tier Pull Down Spice Rack – ideal for smaller cabinets and spice organization
- DPZM 22‑24in 2‑Tier Pull Down Shelf – suited for larger cabinets requiring heavy‑duty support
- NeNchengLi 2‑Tier Pull Down Shelf – a versatile mid‑range option with high‑elasticity springs
- Rev‑A‑Shelf 24in Pull Down Organizer – premium choice with gas‑assist pistons for effortless operation
Step‑by‑Step Instructions
Step 1: Measure the Cabinet Interior
Begin by measuring the width, depth, and height of the cabinet interior to verify compatibility with the selected shelf. Use a steel measuring tape and record dimensions to the nearest millimeter for accuracy. Compare the measurements with the product specifications; for example, the Rurazong 3‑Tier Pull Down Spice Rack fits cabinets up to 38 cm wide, 23 cm deep, and 22 cm high. If the cabinet exceeds these limits, consider the DPZM 22‑24in 2‑Tier Pull Down Shelf, which accommodates widths from 22 to 24 inches.
Step 2: Gather and Inspect All Components
Unbox the chosen shelf and lay out all components on a clean work surface. Verify that the mounting plates, screws, and any spring mechanisms are present, as indicated in the product packaging. The NeNchengLi 2‑Tier Pull Down Shelf includes guardrails and L‑shaped fixed bases that enhance stability during operation. Inspect each part for damage; damaged components should be returned under the manufacturer’s warranty before proceeding.
Step 3: Mark the Installation Location
Using a pencil, mark the exact positions for the mounting plates on the interior side walls of the cabinet. Ensure the marks are level by aligning a carpenter’s level with the top edge of the intended shelf height. For heavy‑duty models such as the Rev‑A‑Shelf 24in Pull Down Organizer, it is advisable to locate a stud or reinforce the mounting area with a wooden backing strip. Double‑check that the marks allow the shelf to retract fully without contacting the cabinet door.
Step 4: Drill Pilot Holes
Select a drill bit that matches the diameter of the supplied screws, typically 3 mm for the Rurazong model. Carefully drill pilot holes at the previously marked locations, maintaining a perpendicular angle to avoid enlarging the hole. Apply gentle pressure and withdraw the drill periodically to clear wood chips. For cabinets with laminate surfaces, use a low‑speed setting to prevent chipping.
Step 5: Attach the Mounting Plates
Secure the mounting plates with the supplied screws, tightening them until the plates are flush with the cabinet wall. The Rurazong product recommends flattening and stabilizing the plate before tightening to ensure a firm grip. Use a torque‑controlled screwdriver if available to avoid over‑tightening, which could strip the wood fibers. Confirm that the plates are firmly anchored by applying light pressure to the shelf; there should be no wobble.
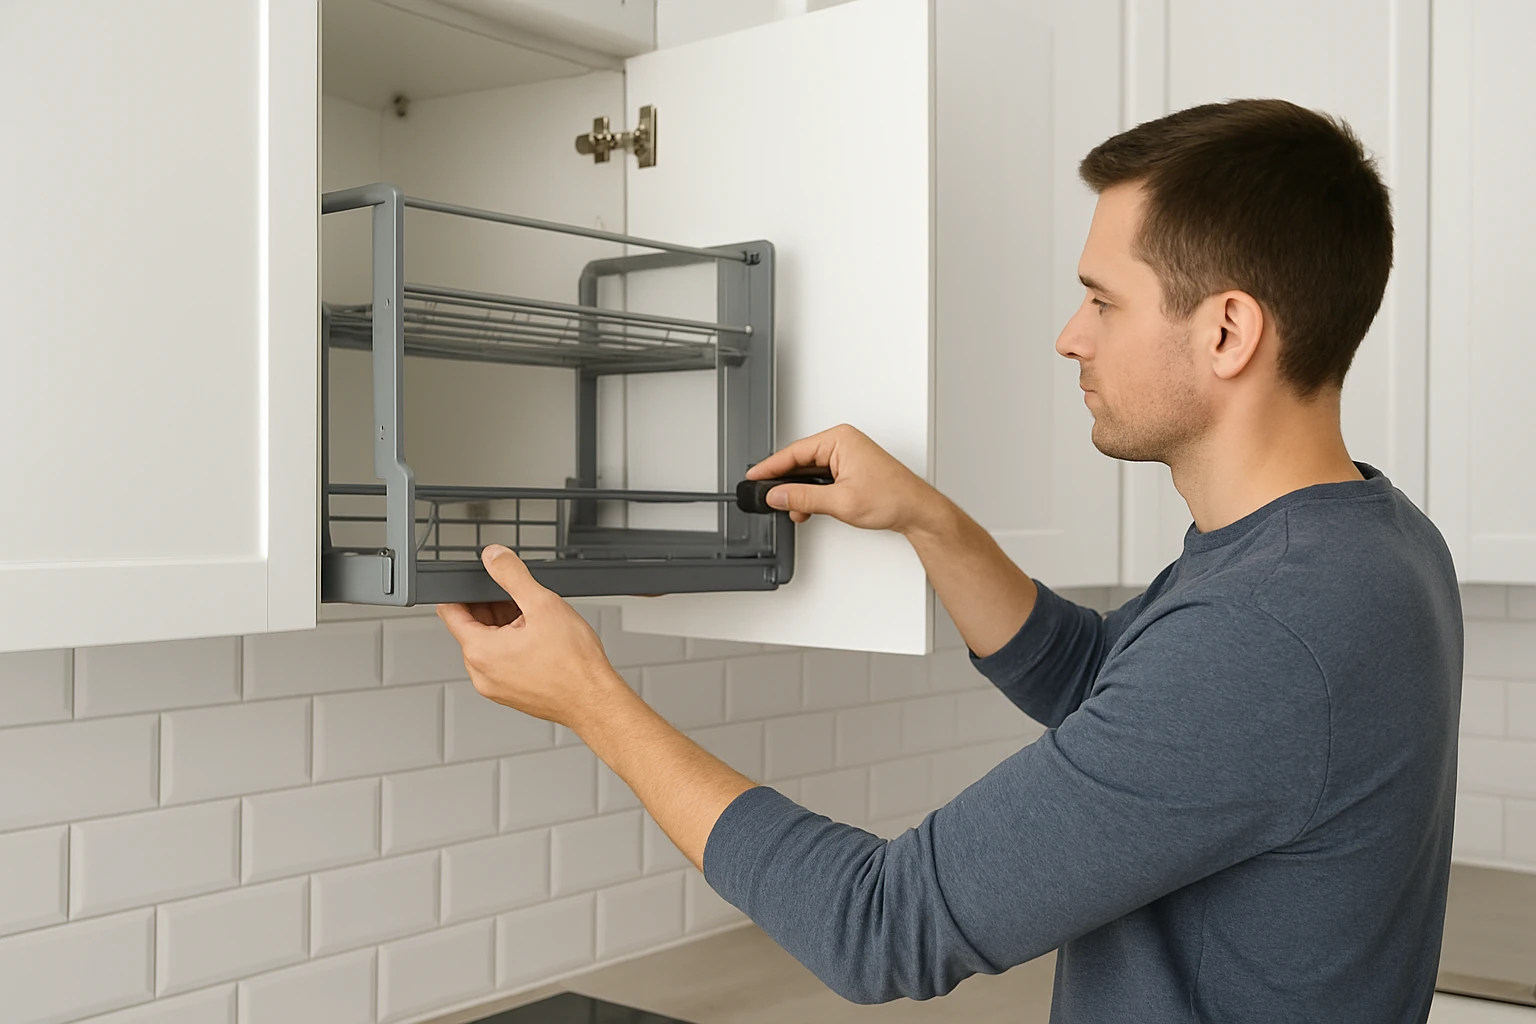
Step 6: Install the Pull‑Down Shelf
Slide the shelf onto the mounted plates, aligning the guide rails with the plate slots. For the DPZM shelf, engage the load‑grading buttons to set the desired weight capacity, up to 55 lb, before fully lowering the shelf. The NeNchengLi model features high‑elasticity springs that should compress smoothly as the shelf is pulled down. Ensure that any guardrails are correctly positioned to prevent items from falling during use.
Step 7: Test the Mechanism
Gently pull the shelf down to its lowest position and release it to verify that it returns to the closed position without binding. The Rev‑A‑Shelf utilizes gas‑assist pistons that provide a controlled descent and lock‑in feature for safety. Load the shelf with a few lightweight items first, then gradually increase the load to the intended capacity. Observe the shelf for any signs of flexing or excessive noise, which could indicate improper installation.
Step 8: Adjust and Finish
If the shelf does not sit level, loosen the mounting screws slightly, reposition the plate, and retighten. For cabinets with uneven doors, consider installing a short spacer behind the mounting plate to achieve proper alignment. Once satisfied with the operation, replace any cabinet door panels and verify that the door closes without obstruction. Finally, clean the shelf surface with a mild detergent to remove any manufacturing residues.
Tips & Pro Tips
- Always drill pilot holes before inserting screws to prevent wood splitting.
- When installing in a cabinet with a glass back, use a protective cloth to avoid scratching the glass.
- For maximum load capacity, distribute weight evenly across all tiers of the shelf.
- Consider adding non‑slip silicone pads beneath heavy items to reduce movement during pull‑down.
Troubleshooting
Problem: Shelf sticks halfway down.
Solution: Check that the mounting plates are perfectly parallel; misalignment can cause the guide rails to catch.
Problem: Shelf sags under load.
Solution: Verify that the load does not exceed the rated capacity (e.g., 11 lb for Rurazong, 55 lb for DPZM). Reduce the weight or upgrade to a heavier‑duty model.
Conclusion
By following this comprehensive guide, one can successfully install pull‑down shelves in kitchen cabinets, thereby converting wasted overhead space into functional storage. The recommended products provide reliable performance, each tailored to specific cabinet dimensions and load requirements. Implementing the tips and troubleshooting steps will ensure long‑term durability and ease of use. With organized upper cabinets, daily cooking tasks become more efficient and enjoyable.
Products Mentioned in This Guide
Frequently Asked Questions
What tools are required to install pull‑down shelves in kitchen cabinets?
You need a measuring tape, power drill with bits, Phillips‑head screwdriver, carpenter’s level, and optionally a stud finder.
Can pull‑down shelves be used in rooms other than the kitchen?
Yes, the same installation method works for bathrooms, utility closets, or any cabinet with a hard‑to‑reach upper section.
How do I ensure the shelf is level and properly aligned?
Measure and mark the mounting points, then use a carpenter’s level while securing the hardware to keep the shelf perfectly horizontal.
What weight can a typical pull‑down shelf support?
Most commercial pull‑down shelves are rated for 20‑30 lb per shelf, but check the manufacturer’s specifications for exact limits.
Where can I purchase the mounting hardware and shelves?
Quality pull‑down shelf kits and hardware are available on Amazon and at major home‑improvement retailers.